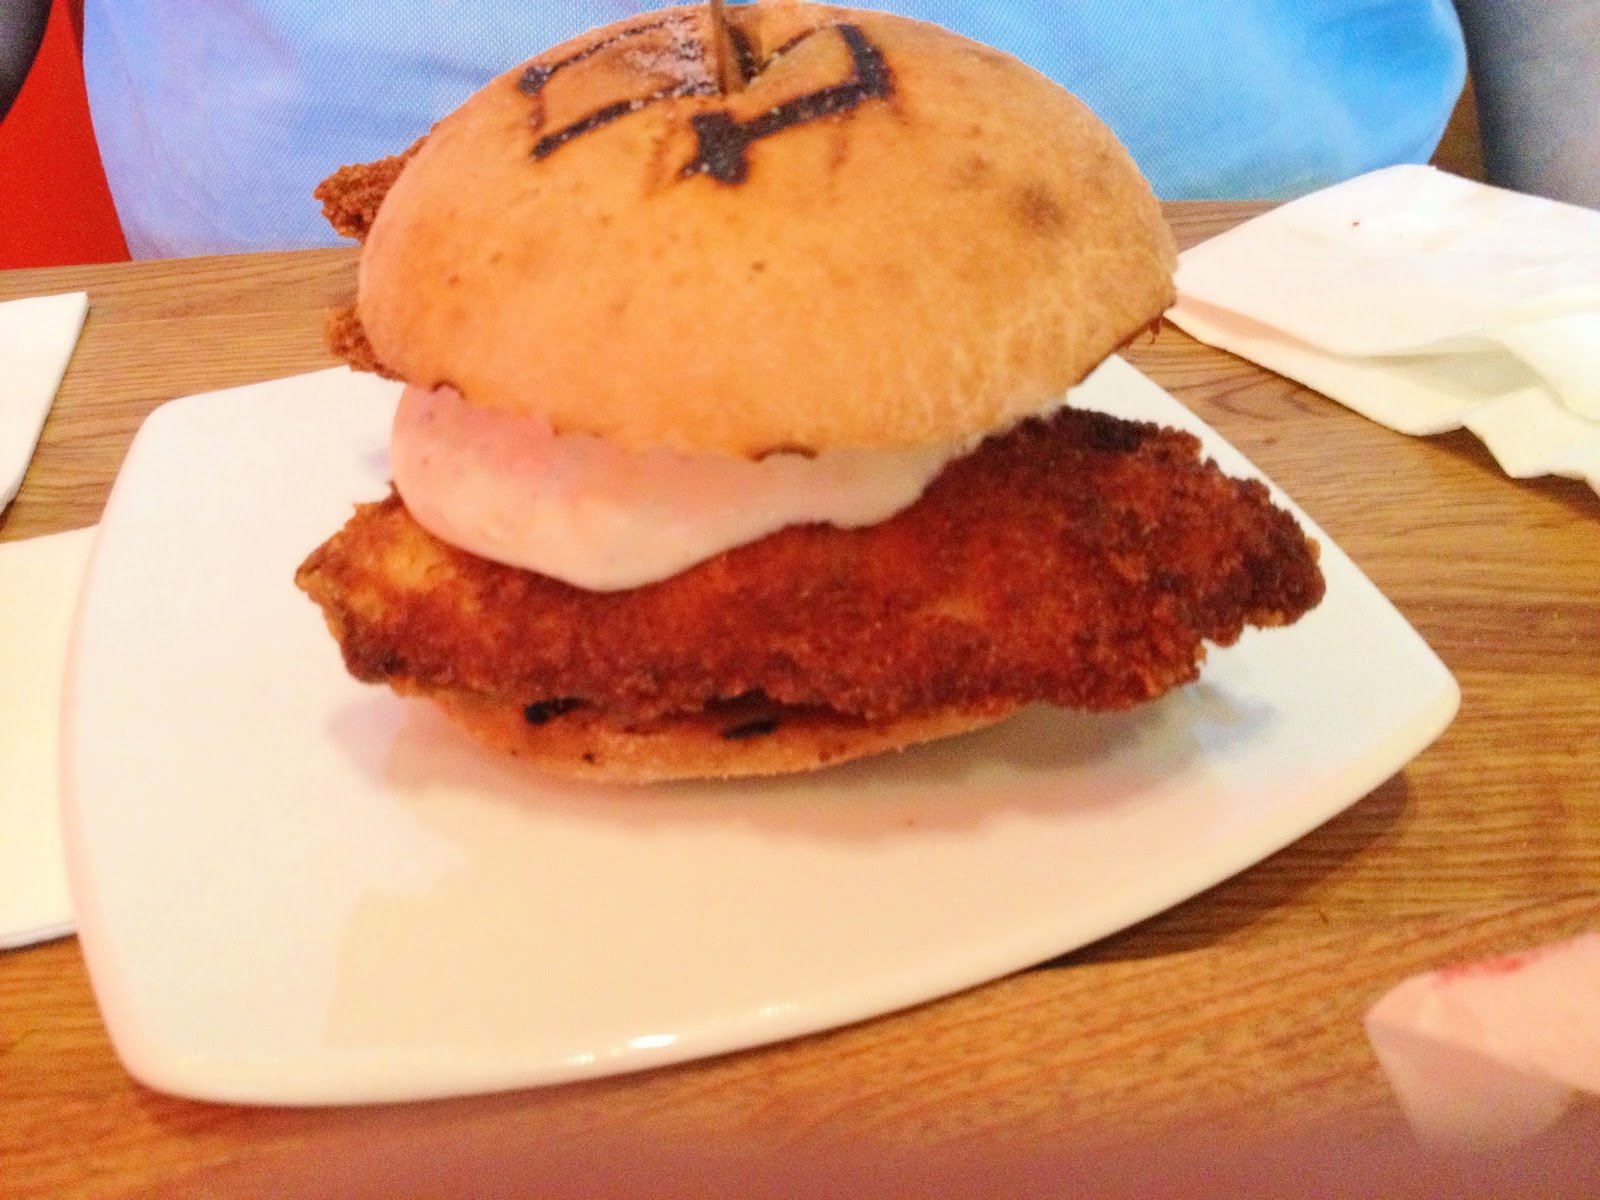
Friday, 26 April 2013

Railway Pub Hotel - South Melbourne


It was hubby's birthday and I was left to decide on a place to go, but unfortunately due to lots going on at the moment I got the place I wanted to go mix up. I make reservations at the Railway Pub hotel in Sth Melb when I actually wanted to go to the Railway Club hotel, I hate it when places sounds alike. When I realise my mistake and try to book it at the railway club it was fully booked out and so was everywhere else that fateful night. So not wanting to end up not having a place we decided to still go ahead with the railway pub.

We were greeted by someone working behind the bar that showed us to our table that we make reservations for. The common dining area was small and only had a few tables that fit in that tiny space.  And it was really dim as you could see from the pictures I took, I could hardly read what was on the menu, no idea if they wanted to create a romantic feel or just could not afford proper light fixtures.

We ordered the garlic bread and wings to start with, garlic bread was warm and it was garlic infused instead of the usual garlic spread that most places just spread on. The wings was described as "salt roasted crispy skin chicken wings" but what we got was more barbecue than crispy skin but the sesame soy aoli it came serve with was delish.

Garlic Bread

Wings with Aoli

I had the char grilled lamb with mash and baby fennel & dill salad. The lamb was a little dry since there was no accompaniment of sauce although I enjoyed the fennel and dill salad which was refreshing and light. Hubby had the 300gm scotch fillet with mash and garlic butter. The steak was cooked right and he enjoyed it. This time we skipped dinner as we were full from the entree and main. 


300gm Scotch Fillet

Char grilled lamb

Overall dinner was pleasant and not too bad. Although I still must go to the other hotel I initially wanted to go to and will blog about it another time.


Location:

Railway Hotel
280 Ferrars Street
South Melbourne
Vic 3205

Monday, 1 April 2013

St Peters - Melbourne CBD

I bought a voucher for this restaurant through Groupon, I usually do so when I see a good deal too hard to resist. This restaurant was offering a 3-course meal each of a entree, main and dessert for two. The other good thing about buying this kind of meal vouchers it gives you a chance to try what is on offer at a fraction of a cost and if they are good it will be a place that I would frequent again.

We were warmly greeted as soon as we walk in through the door and was showed our table when my name was checked off under the reservation list. I was a little disappointed thought that we had the table in one corner of the restaurant close to what seem like a store room. We were given the menu and was told that we could order anything from the entree and main except for dessert where the only choice was Tiramisu.

While waiting for the entrees to arrive, we were serve with a side of warm bread. DH chose the Bruschetta on sourdough bread with tomatoes and mozzarella which he said tasted really good. I had the Calamari fritti served on rocket with a garlic and balsamic dressing, the calamari was cook perfectly but the chef overdid it with the salt on the rocket.


Bruschetta

Calamari Fritti

For mains I chose the Tagliatelle with balmain bugs with chilli and garlic in white wine sauce but the wait staff stuff up my order and brought out the Tortellini which I would have been happy to have but unfortunately from the menu I had read earlier it was a prawn & ricotta filling, I was recently diagnosed to be allergic to prawns, so I had to turn the dish away and insist on what I ordered. The wait staff was apologetic and assured me that I would have my mains as soon as. 

Tagliatelle

DH had the 200g char grilled eye fillet served on polenta, his jaw dropped when he saw the serving size of a small piece of meat sitting in the middle of a huge plate. Nevertheless he tucked into it and enjoyed every bite of it as the meat was cook just the way he like it. The wait staff kept coming back to our table to give me updates on where my main was. I was happy when my main finally arrived as I was starving by then, only to be disappointed to find 3 measly pieces of balmain bugs. Again this dish would have been enjoyable if the chefs had gone easy on the salt.


Char Grill Eye fillet

Plus point was service between meals was really quick and wait staff was pleasant. Downside was the 2 dishes I had both were too salty and the portions were small if you were going to pay the actual price for it. I wonder if it had anything to do with the fact that it was because it was through a voucher deal?


Location:
6 Melbourne Place
Melbourne

Tuesday, 26 March 2013

Chocolate Cupcakes with Earl Grey Icing & Salted Caramel

I was challenge by one of my colleagues who one day had nothing to do at work went browsing for cupcake recipes. He found the recipe online here and was drooling at the picture. Like I've mention many many times before I'm one who prefers very straightforward recipes. I decided to take up the challenge since as mention by him this will prove my culinary skills although I felt like saying I have tried other more challenging recipes than making some mere cupcakes. Anyway there are 3 parts to this recipe, the cupcakes, the icing and finishing it off with the caramel topping. 

I've never use tea in any form of cooking as to me they are best enjoyed in a nice cup of china. So I was intrigued to try my hands on a earl grey icing. And another reason I do not make cupcakes very often is the fact that I'm not very good at decorating them with the icing to make them look pretty so whenever I see a cupcake recipe I usually end up making it into a whole cake instead. 


Cupcake Recipe:

3/4 cup (about 95g) plain/all-purpose flour
3/4 cup (about 170g) sugar (I used caster/superfine but white/granulated is fine too)
1 tsp baking powder
1/2 tsp baking/bicarb soda
1/4 tsp salt
6 tbsp unsweetened cocoa powder, preferably Dutch-process
85g (6 tbsp) butter, melted
6 tbsp (about 90ml) buttermilk
1 large egg
1 large egg white

Method:
  • Preheat oven to 180°C (350°F). 
  • Line a standard cupcake tray with papers. 
  • In a large mixing bowl, combine flour, sugar, baking powder, bicarb soda, and salt; set aside. 
  • With an electric mixer, combine cocoa and 3 tablespoons hot water until a thick paste forms (this process intensifies the chocolate flavor). 
  • Add butter, buttermilk, egg, and egg white; beat until combined. 
  • Whisk in flour mixture until smooth. Scoop (or spoon) batter into prepared papers, filling them about 3/4 full.
  • Bake until a toothpick inserted in the centre of a cupcake comes out clean, about 20 minutes. 
  • Transfer cupcakes to a wire rack to cool completely.
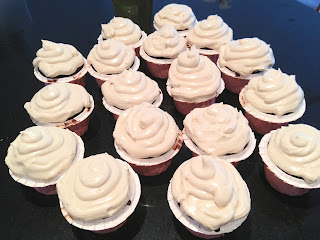


Earl Grey Icing:

2 large egg whites
3/4 cup tightly packed brown sugar
1/4 tsp cream of tartar
1/8 teaspoon salt
1/2 cup strongly brewed Earl Grey tea (I used 3 teabags/about 3 tsp loose leaf tea)

Method:
  • Beat egg whites in a large mixing bowl until foamy & thick, they should mound, but not peak.
  • In a saucepan, combine the sugar, cream of tartar, 1/4 cup Earl Grey tea & salt. 
  • Bring to a boil. Boil for 3-4 minutes, or until a candy thermometer reads 117°C (242°F) and all sugar is dissolved. 
  • Begin beating the egg whites again and slowly pour in boiling sugar syrup in a slow steam. 
  • Continue to beat on high for 7 minutes or until stiff peaks form. 
  • Add remaining tea by the tablespoon, beating after each addition.
  • Continue beating until icing reaches desired consistency (it should hold its shape when piped and cooled), about 2 minutes.
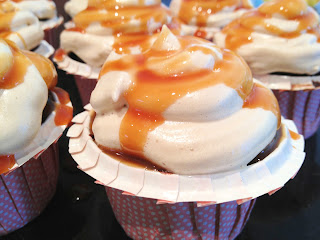


Salted Caramel Topping:


2 cups granulated sugar
12 tablespoons unsalted butter, at room temperature, cut into pieces
1 cup heavy cream, at room temperature
1 tablespoon Fleur de sel (or any other flaky sea salt)

Method:

  • Add the sugar in an even layer over the bottom of a heavy saucepan, with a capacity of at least 2 or 3 quarts. 
  • Heat the sugar over medium-high heat, whisking it as it begins to melt. You'll see that the sugar will begin to form clumps, but that's okay. Just keep whisking and as it continues to cook, they will melt back down.
  • Stop whisking once all of the sugar has melted, and swirl the pan occasionally while the sugar cooks.
  • Continue cooking until the sugar has reached a deep amber colour. It should look almost a reddish-brown, and have a slight toasted aroma. This is the point where caramel can go from perfect to burnt in a matter of seconds, so keep a close eye. If you are using an instant-read thermometer, cook the sugar until it reaches 350 degrees F.
  • As soon as the caramel reaches 350 degrees, add the butter all at once. Be careful, as the caramel will bubble up when the butter is added.

Whisk the butter into the caramel until it is completely melted.Remove the pan from the heat and slowly pour the cream into the caramel. Again, be careful because the mixture will once again bubble up ferociously.Whisk until all of the cream has been incorporated and you have a smooth sauce. Add the fleur de sel and whisk to incorporate.Set the sauce aside to cool for 10 to 15 minutes and then pour into your favourite glass jar and let cool to room temperature. You can refrigerate the sauce for up to 2 weeks. You'll want to warm the sauce up before using.



This is one of those recipes that I'll keep at the back of my archive shelf for a long time to come as it was a tedious and messy process. Although the cupcake itself was easy enough to make the icing was another ball game altogether. Because it was not a butter and icing sugar base it was not stiff enough and very "light" and "airy" due to the egg whites which makes my piping a lot harder. As for the caramel I burnt the first batch as I move away for just a few seconds to get the butter to add in, as mention in the method above not to do but silly me did not read that part. And oh my was drizzling it over the icing a very messy process, my daughter walk into the kitchen as I was doing it, saw the kitchen counter and exclaim "Mummy you have make an absolute mess!" I had caramel dripping from all sides of my cupcakes.


As for the taste test I must say that Earl grey is such a clever idea to add to flavor in baking, the icing tasted absolutely divine. After all the hard work I could sit with a cup of tea in my fine china and slowly devour the fruit of my labour.

Friday, 22 March 2013

Jus Burgers - South Yarra


Recently I've been on an expedition to find great spots that serves quality burgers, the ones that are fresh and not from a frozen pack. I kicked off my journey by going to Brother Burger which is in my previous post, check out my review there as I'm not going to let it steal the limelight of Jus Burgers. 

Jus Burgers originated from Perth, bless their hearts for opening a outlet in Melbourne hopefully they will branch out and open another specifically in the city. The place had a casual feel to it, wait staff came over as soon as they saw us, approaching arm with menus, I like a place that is attentive to their customers. 

Since I had already check out the menu even before I got there I knew exactly what I was going to have so I gave hubby and DH some time to look over it. Once they have decided, I walk over to the counter to place my order with much anticipation as I saw patties of meat being grilled on the griller, love the open concept where you can see how your food is being prepared.


Left: Regular slaw, Right: Onion Rings

Since our burgers did not come with chips, I ordered the onion rings as sides as well as the regular slaw to make it a complete meal with all the essential food groups in it. It was not a long wait before our sides were served, the onion rings came with aioli and we scoffed it really quickly.
There was about 6 huge rings which was generously crumbed, it was not greasy. The slaw on the other hand was so finely grated that you could not tell what vegetables was in it but it tasted great with the right amount of mayo and seasoning.

Wagyu Burger

I went with the wagyu burger and added cheese & avocado as an additional option. The wagyu was juicy and succulent. It was held together by a knife in the middle, you know a burger is packed with goodness when it has to be held by a knife. The buns were nicely toasted and not at all flimsy that it could not hold all the great stuff that's in it.And there was a little heat with the wasabi mayo that you get with every bite.


Kid's Fish Burger

DH fish burger and chips arrived next, it was a pretty decent size burger for a kid. DH had to open her mouth wide enough for the burger to fit but all she got were a teeny bite. I had a taste of it, the fish was fresh although they could have taken it off the fryer slightly earlier it was a little too overdone.


Fish Burger
We were almost half way thru our meals when we started to wonder where hubby's burger was, I ask one of the wait staff who promptly went to check and found out that the kitchen staff had thought we only had one fish burger order which was the kid meal. They apologise and got it prepared and served within 10mins. Hubby had the larger version of the fish burger with 2 generous portion of fish fillets and heaps of mayo in between. He also had the same sentiment that the fish was overdone.

Overall it was a good fast food place better than your usual places like Maccas or Hungry Jacks. I will definitely be back to try their other offerings.


Location:
364 Chapel St 
South Yarra
VIC 3141


Monday, 18 March 2013

Pistachio & Almond Tart with Homemade Orange Ice Cream

I love tarts of all kinds, it's just comforting to sink your teeth into buttery, crumbly pastry that melts in your mouth. So when I saw this recipe in a recent MKR episode I just knew that I had to make it. Just a warning though this recipe requires a lot of eggs in particular the yolks and I was left with a lot of whites at the end of it.

I have to admit that I was a little put off when I read the recipe as I am not a big fan of recipes that uses a lot of yolks, I find they have a "eggy" taste to it. And I was going to bail out and buy the ice-cream but then I thought that would only be half the fun in making the recipe.

There are 3 components to this recipe, the ice  cream, the tart and lastly the filling. So this is my very first attempt at making ice-cream and I approach the task at hand very warily not knowing what to expect. I followed the recipe to a tee like my life depended on it and was glad at the end result.

Orange Ice-Cream
Ingredients:
600ml thickened cream
300ml milk
1 vanilla bean, seeds scraped
finely grated zest of 2 oranges
1 cinnamon stick
220g caster sugar
6 egg yolks
100ml orange juice

Method:
  1. To make ice-cream, stir cream, milk, vanilla seeds, zest and cinnamon in a saucepan over low heat until hot. Remove from heat. Stand 10 minutes. Remove cinnamon stick.
  2. Beat sugar and yolks with an electric mixer until thick and creamy. Gradually add hot cream mixture to egg mixture, whisking continuously.
  3. Return mixture to saucepan and stir over a medium heat until thick enough to coat the back of a spoon. Stir in orange juice. Strain into a bowl, cover with plastic wrap and refrigerate 3 hours or until cold. Transfer to a ice-cream machine and churn according to manufacturers instructions.
Note: I did not use an ice cream machine, I just let it freeze overnight and I still got the consistency of ice cream the next day.
Cream mixture ready for freezing
Pastry
225g plain flour
50g caster sugar
1/2 tsp fine salt
180g butter
1 egg yolk

Filling
5 green cardamom pods, seeds only
200g blanched almonds
300g shelled pistachios
250g caster sugar
4 egg yolks
2 eggs
Grated zest of 1 orange

Top: Filling
Bottom: Baked Tart from oven
Method:
  1. Preheat oven to 180C. Grease a 24cm round tart tin with removable base.
  2. To make pastry, process flour, sugar, salt and butter to form crumbs. Add egg yolk. Process to combine. Form pastry into a disc and cover in cling film. Refrigerate for 30 minutes.
  3. Roll out pastry between two sheets of baking paper to line base and side of prepared tin. Ease pastry into tin. Refrigerate for 30 minutes. Prick base all over. Line with baking paper and fill with pastry weights.
  4. Bake for 20 minutes. Remover paper and weights. Bake for a further 5 minutes or until light golden and crisp. Cool.
  5. To make filling, grind cardamom seeds in a pestle and mortar to form a fine powder. Place in a processor with nuts and sugar. Process to form fine crumbs. Add remaining ingredients. Process until combined. Spread filling into pastry case.
  6. Bake for 25 minutes or until golden brown. Cool. Cut into small wedges.
  7. Serve tart with ice cream, orange segments and crushed pistachios.


Making the ice cream was'nt as daunting as I initially thought and I actually enjoyed the whole process. My kid loves it and wants me to try a chocolate flavour next which I might just do for my next blog. The tart and ice cream was a great combination together.

Friday, 8 March 2013

Squid Stuffed with Chicken

As an avid cook and baker I'm constantly looking for inspirations to try new recipes. I was watching one of the episodes on My Kitchen Rules and one of the pair of contestants had prepared a squid dish and it look really good. The weekend I wanted to try the dish out the recipe was not on the official site yet therefore I use my creativity and came up with my own. 

Note that my recipe varied quite a bit from the original as first of all I use chicken mince and secondly I omitted the prawns as I'm allergic to it. And instead of serving it with sweet chilli sauce I made a tartar sauce as I thought that would have gone better with the squid.

Crumbed stuff squid

Ingredients:
4 Squid clean 
flour for dusting
1 egg lightly beaten
Panko breadcrumbs enough to coat
Vegetable oil for deep frying 

Stuffing:
300gm chicken mince 
2 cloves garlic
50gm bacon fried till crispy
1tbsp oregano*
1tbsp thyme*
1tbsp basil*
*use fresh chopped herbs 
2tbsp pinenuts dry toast in a pan
Salt & pepper to taste

Method:
  1. Place all the stuffing ingredients in a bowl and combine together. Stuff squid with the filling, do not over stuff as the ingredients will spill out when steaming as noted in my picture. Secure the ends with a toothpick.
  2. Steam squid in a steamer for 5 mins, leave aside to cool.
  3. Dust squid with flour, dip in egg and coat well in breadcrumbs.
  4. In a wok heat oil and fry squid till golden brown.


Steam Squid

Homemade Tartar Sauce
200gm mayonnaise
1tsp capers
2 small gerkhins
Half red onion grated
Juice from half lemon
Salt and pepper to taste 
  • Mix all the above ingredients together and serve.
Now that the recipe has been published in the official site, I'll give that a try but I must say my version was'nt too bad either. Do give it a try.


Wednesday, 6 March 2013

Guiness Ginger Spice Cake

One of my colleague recently announce she was pregnant, that explains why she is constantly sick. Since she let the cat out of the bag she mention that the only thing that help keeps food down and not in the toilet was ginger. She has been having that in all forms like tea, candied ginger, ginger biscuits, etc. So I thought I'd make this cake for her, gives her another variety of eating ginger.


Stout & molasses mixture after adding the baking soda

Ingredients:
  • 1 cup Guinness stout
  • 1 cup molasses
  • 1/2 tablespoon baking soda
  • 3 large eggs
  • 1/2 cup granulated sugar
  • 1/2 cup firmly packed dark brown sugar
  • 3/4 cup grapeseed or vegetable oil
  • 2 cups all-purpose flour
  • 2 tablespoons ground ginger
  • 1 1/2 teaspoons baking powder
  • 3/4 teaspoon ground cinnamon
  • 1/4 teaspoon ground cloves
  • 1/4 teaspoon freshly grated nutmeg
  • 1/8 teaspoon ground cardamom
  • 1 tablespoon grated, peeled fresh gingerroot


Batter ready for oven


Preparation:

1. Preheat oven to 350°F. Butter a 9- X 5-inch loaf pan, line the bottom and sides with parchment, and grease the parchment. 
2. In a large saucepan over high heat, combine the stout and molasses and bring to a boil. Turn off the heat and add the baking soda. Allow to sit until the foam dissipates.
3. Meanwhile, in a bowl, whisk together the eggs and both sugars. Whisk in the oil.
4. In a separate bowl, whisk together the flour, ground ginger, baking powder, cinnamon, cloves, nutmeg, and cardamom.
5. Combine the stout mixture with the egg mixture, then whisk this liquid into the flour mixture, half at a time. Add the fresh ginger and stir to combine.
6. Pour the batter into the loaf pan and bake for 1 hour, or until the top springs back when gently pressed. Do not open the oven until the gingerbread is almost done, or the center may fall slightly. Transfer to a wire rack to cool.


The mistake I make was not to line the cake tin with parchment paper and I had a hard time trying to get the cake out without disfiguring it. Since molasses was involve the cake turn out really sticky and stuck really well to the wall and base of the tin. Although the ends was broken off in the struggle I still manage to save the middle part.

It's not one of the best looking cake that's probably why I forgot to take a picture of the end product, but it was moist and you could get the predominant taste of ginger in every bite. If you are not a fan of ginger this will not appeal to you but my colleague absolutely loved it and she was grateful.